Apple Mail Setup Guide
Mail app · macOS (all versions)
Apple Mail is built into every Mac. These steps work on all recent versions of macOS, including Sequoia, Sonoma, and Ventura.
Settings at a Glance
Incoming Mail (IMAP)
Outgoing Mail (SMTP)
Steps
Open Mail
Open Mail from your Applications folder or by pressing ⌘ Space and typing Mail.
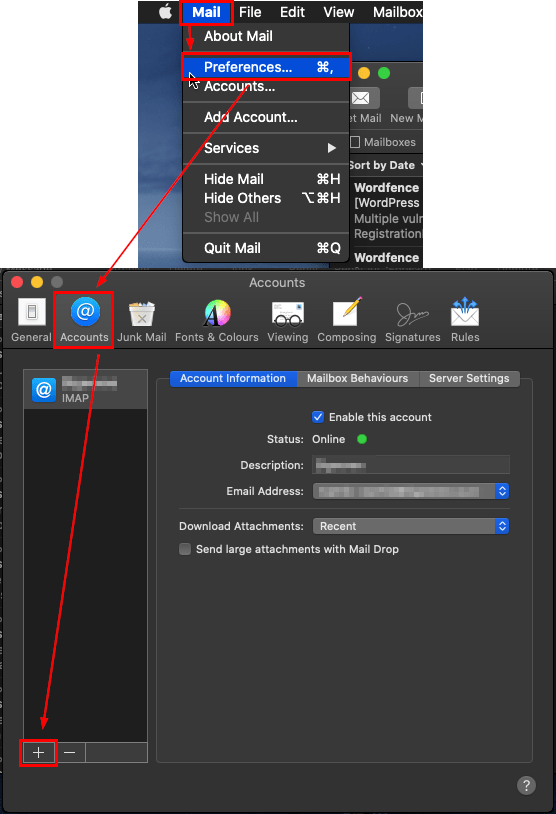
Open Accounts settings
If the account setup wizard opens automatically, skip to step 3.
Otherwise, click Mail in the menu bar → Settings (or Preferences on older macOS) → click the Accounts icon → click the + button at the bottom-left.
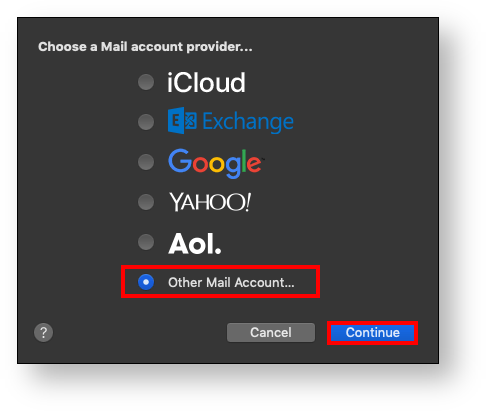
Select "Other Mail Account"
In the account type list, select Other Mail Account… and click Continue.
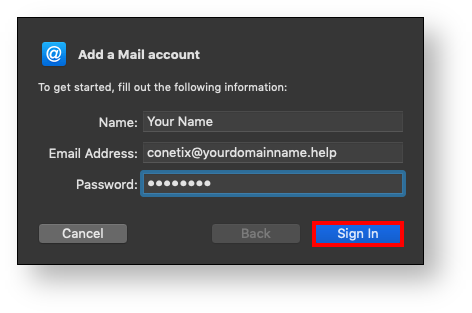
Enter your account details
Fill in your credentials:
- Full Name: your name (shown on outgoing messages)
- Email Address: your full email address
- Password: your email password
Click Sign In.
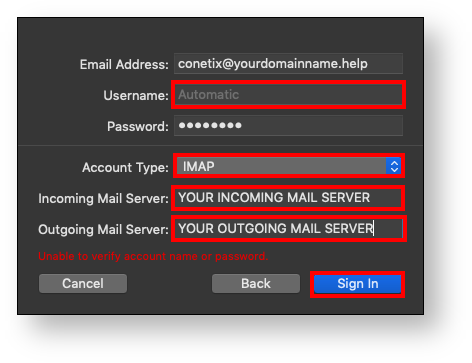
Enter the mail server addresses
Mail will try to find your settings automatically and fail — that's normal. It then shows the server configuration fields. Fill them in:
- Account Type: IMAP
- Incoming Mail Server:
imap.topmail.com - Outgoing Mail Server:
smtp.topmail.com
Click Sign In.
Complete account creation
If prompted about additional apps (Notes, etc.), uncheck anything you don't need and click Done.
Your account is now in Mail, but the ports and encryption may not be set correctly yet. Proceed to the next step to confirm them.
Verify server settings
Go to Mail → Settings → Accounts → select your new account → click the Server Settings tab.
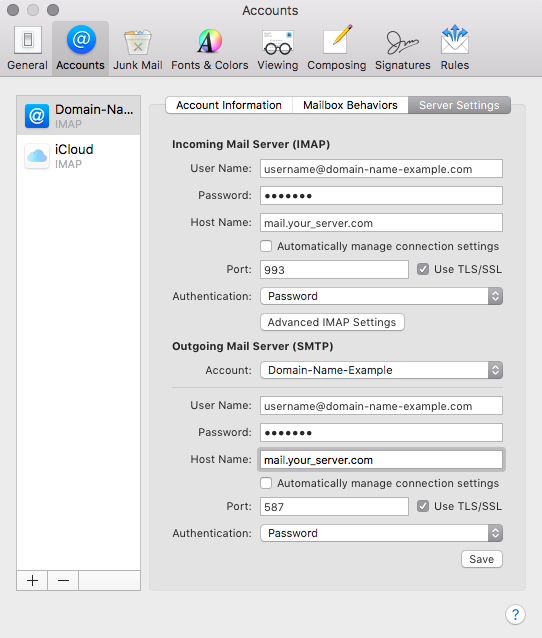
Set incoming server (IMAP)
Under Incoming Mail Server (IMAP):
- Uncheck Automatically manage connection settings
- Host Name:
imap.topmail.com - Port: 993
- Use TLS/SSL: on
- Authentication: Password
Set outgoing server (SMTP)
Under Outgoing Mail Server (SMTP):
- Uncheck Automatically manage connection settings
- Host Name:
smtp.topmail.com - Port: 587
- Use TLS/SSL: on
- Authentication: Password
Click Save.
Send a test message
Close Settings and compose a quick test email to yourself to confirm both sending and receiving are working correctly.
Troubleshooting
Click Next or Continue when prompted — Mail often shows a connection warning during setup but still creates the account. You can correct the ports in step 7 afterwards.
Go to Mail → Settings → Accounts → [your account] → Server Settings. Under Outgoing, uncheck "Automatically manage connection settings" and set port to 587 with TLS/SSL on.
This usually means the port is wrong. Confirm the incoming port is 993 and outgoing is 587, both with TLS/SSL enabled.