Outlook for Mac Setup Guide
Microsoft Outlook · macOS
These steps cover Microsoft Outlook for Mac (Microsoft 365 version). The process takes around two minutes.
Settings at a Glance
Incoming Mail (IMAP)
Outgoing Mail (SMTP)
Steps
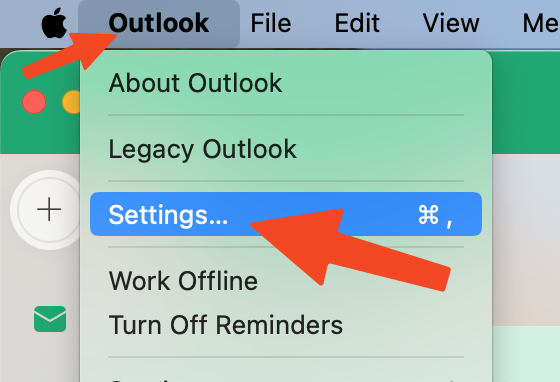
Open Outlook Settings
Open Microsoft Outlook on your Mac. Click Outlook in the menu bar → Settings (or Preferences on older versions).
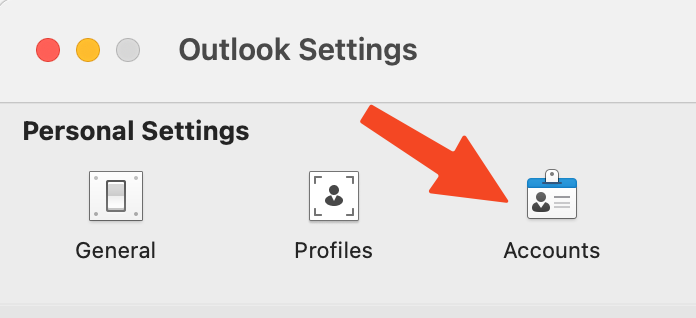
Open Accounts
In the Settings window, click Accounts.
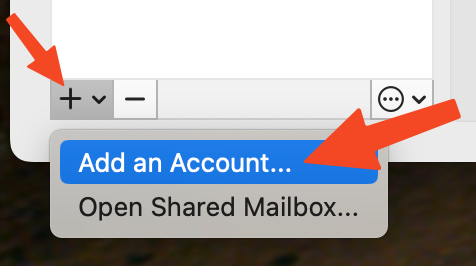
Add a new account
Click the + (plus) button at the bottom-left of the Accounts pane → click New Account… (or Add an Account).
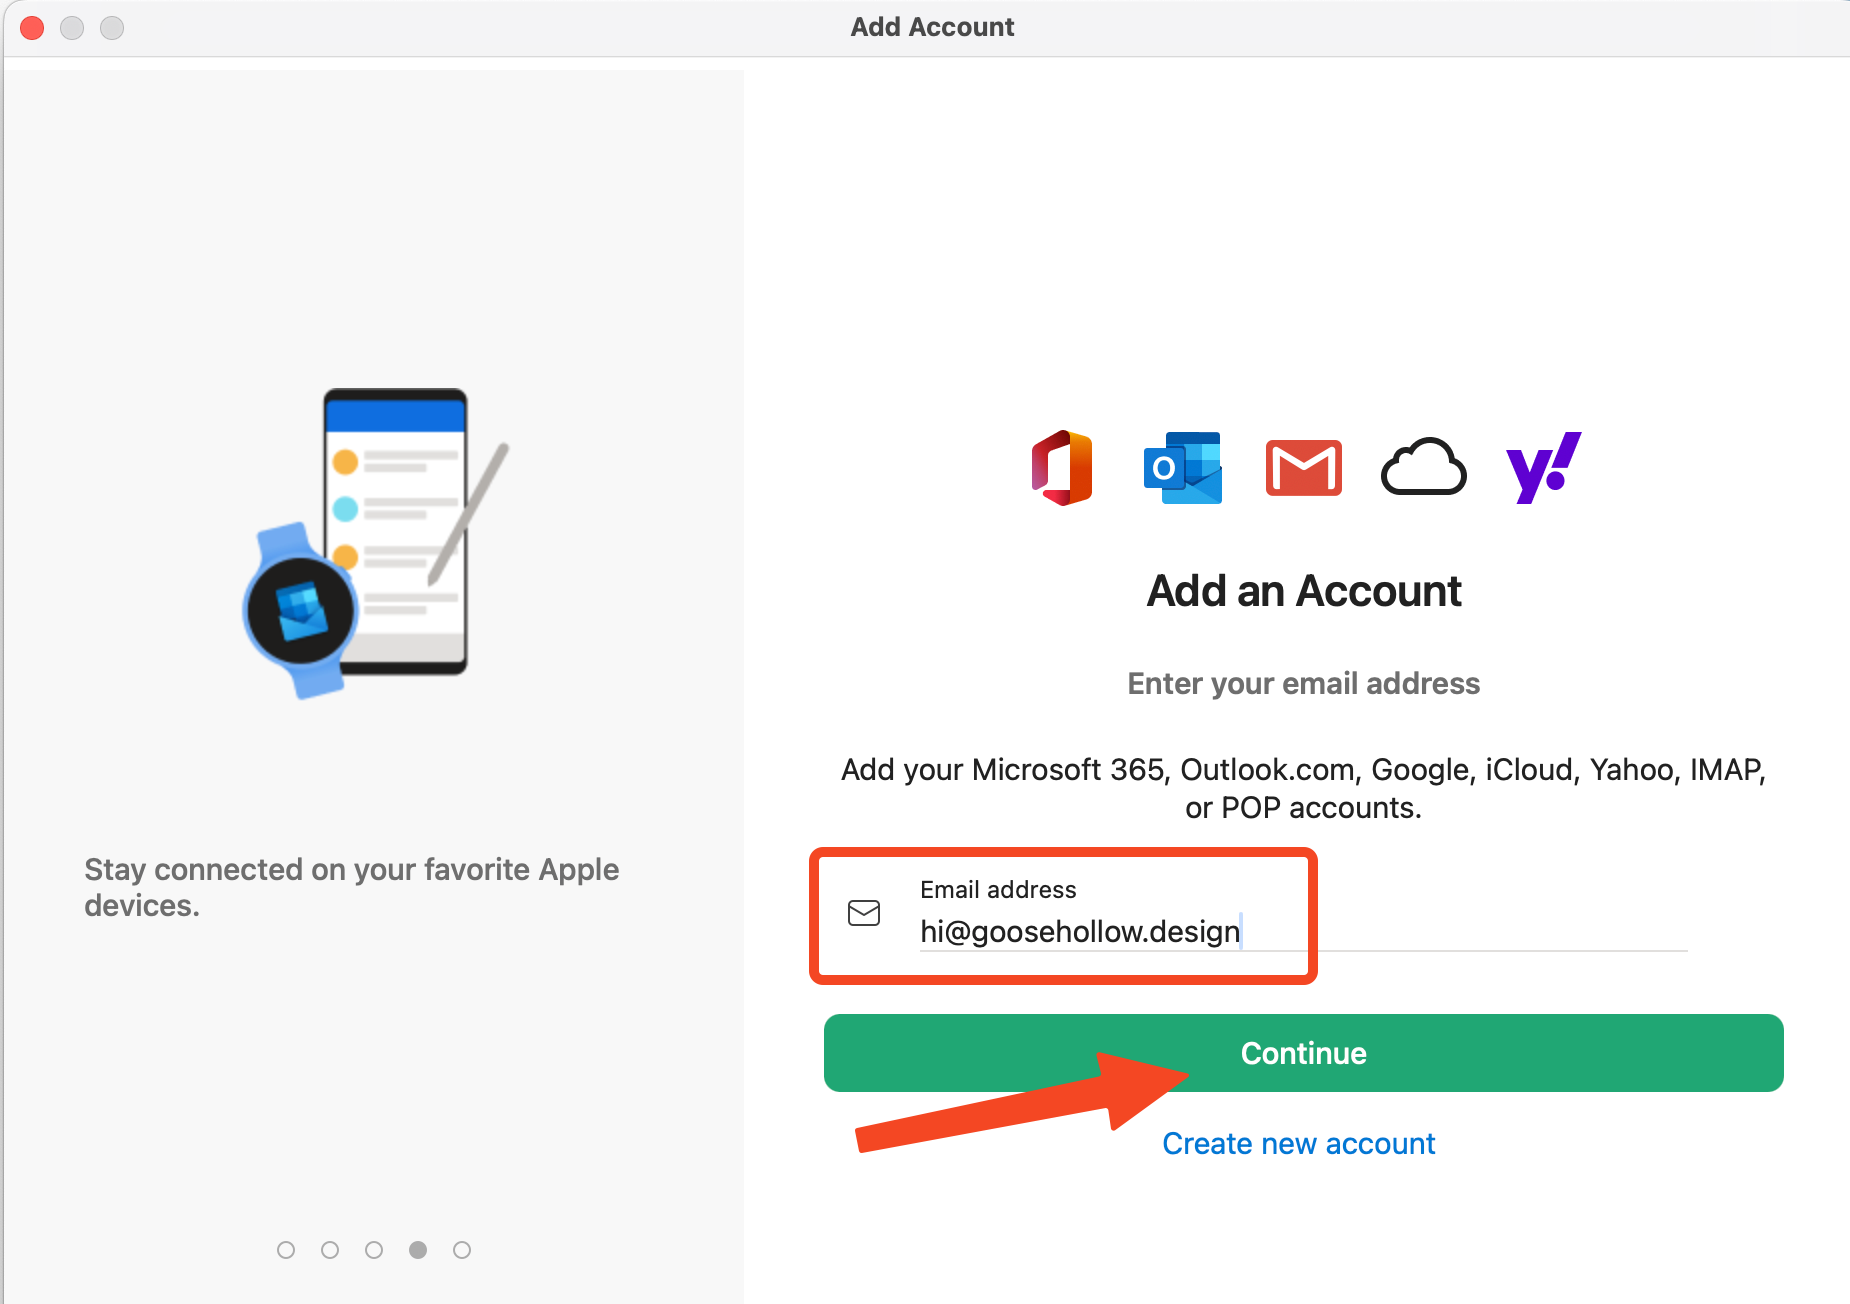
Enter your email address
Type your full email address and click Continue.
Choose IMAP and reveal server fields
Outlook will attempt to configure your account automatically. When it cannot find Topmail's settings, it will show an IMAP setup screen with your email address and password fields.
Enable the Show Advanced Settings toggle (it may be labelled Show more in newer versions). This reveals the IMAP and SMTP server fields.
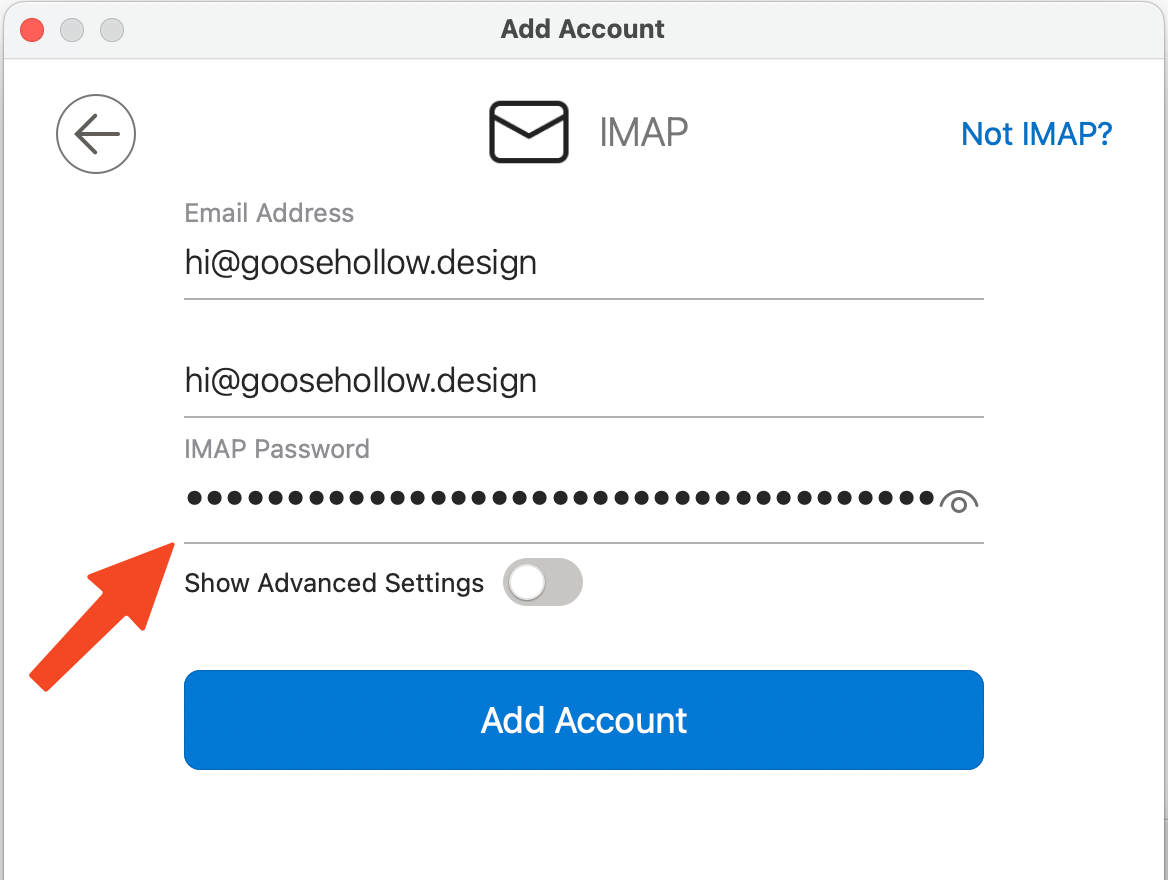
Enter server settings
With the advanced fields visible, fill in:
- IMAP Incoming server:
imap.topmail.com - IMAP Port: 993 · Secure connection type: SSL / TLS
- SMTP Outgoing server:
smtp.topmail.com - SMTP Port: 587 · Secure connection type: STARTTLS
Click Add Account.
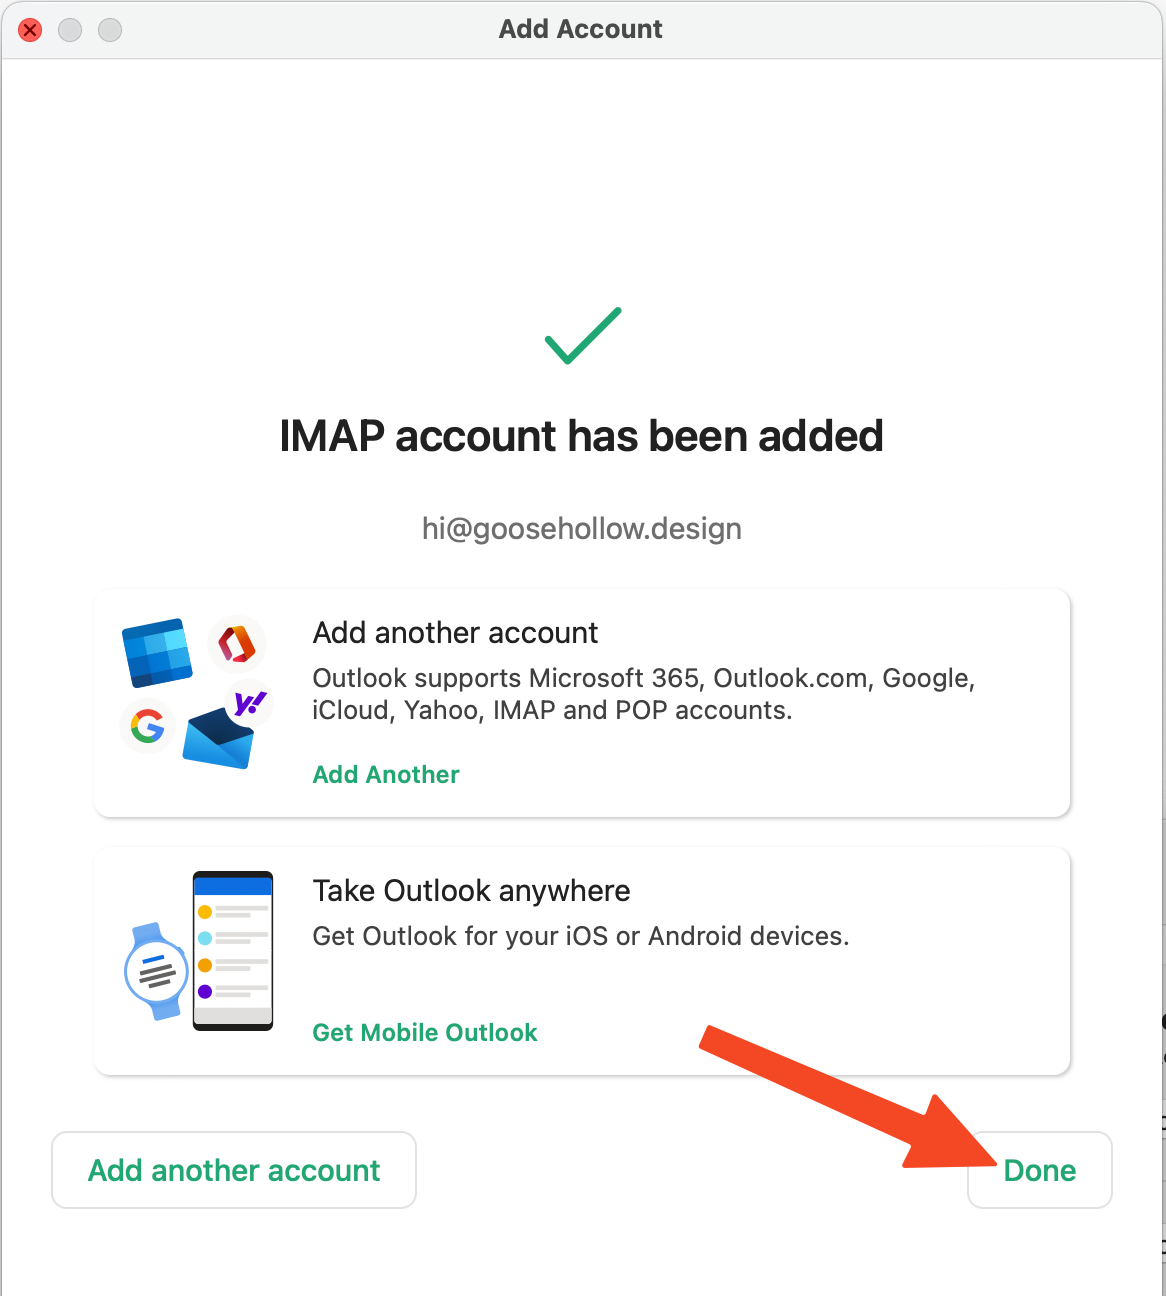
Finish and test
Outlook will verify the connection and show a confirmation screen. Click Done. Your Topmail inbox will appear in Outlook's sidebar. Send yourself a quick test email to confirm sending and receiving are both working.
Troubleshooting
Double-check the server addresses: incoming must be imap.topmail.com port 993, outgoing must be smtp.topmail.com port 587. Also confirm SSL/TLS is enabled for incoming and STARTTLS for outgoing.
Go to Outlook → Settings → Accounts → select your account → click Advanced and verify the IMAP port is 993 with SSL enabled.
In account settings, click Advanced and check the SMTP port is 587 with TLS enabled and that your SMTP credentials are saved.