Windows Mail Setup Guide
Mail app · Windows 10 and Windows 11
The Mail app is built into Windows 10 and Windows 11. Use the Advanced Setup option to add your Topmail account — the automatic detection won't find Topmail's settings.
Settings at a Glance
Incoming Mail (IMAP)
Outgoing Mail (SMTP)
Steps
Open the Mail app
Press the Start button and search for Mail. Click the Mail app to open it.
Open account settings
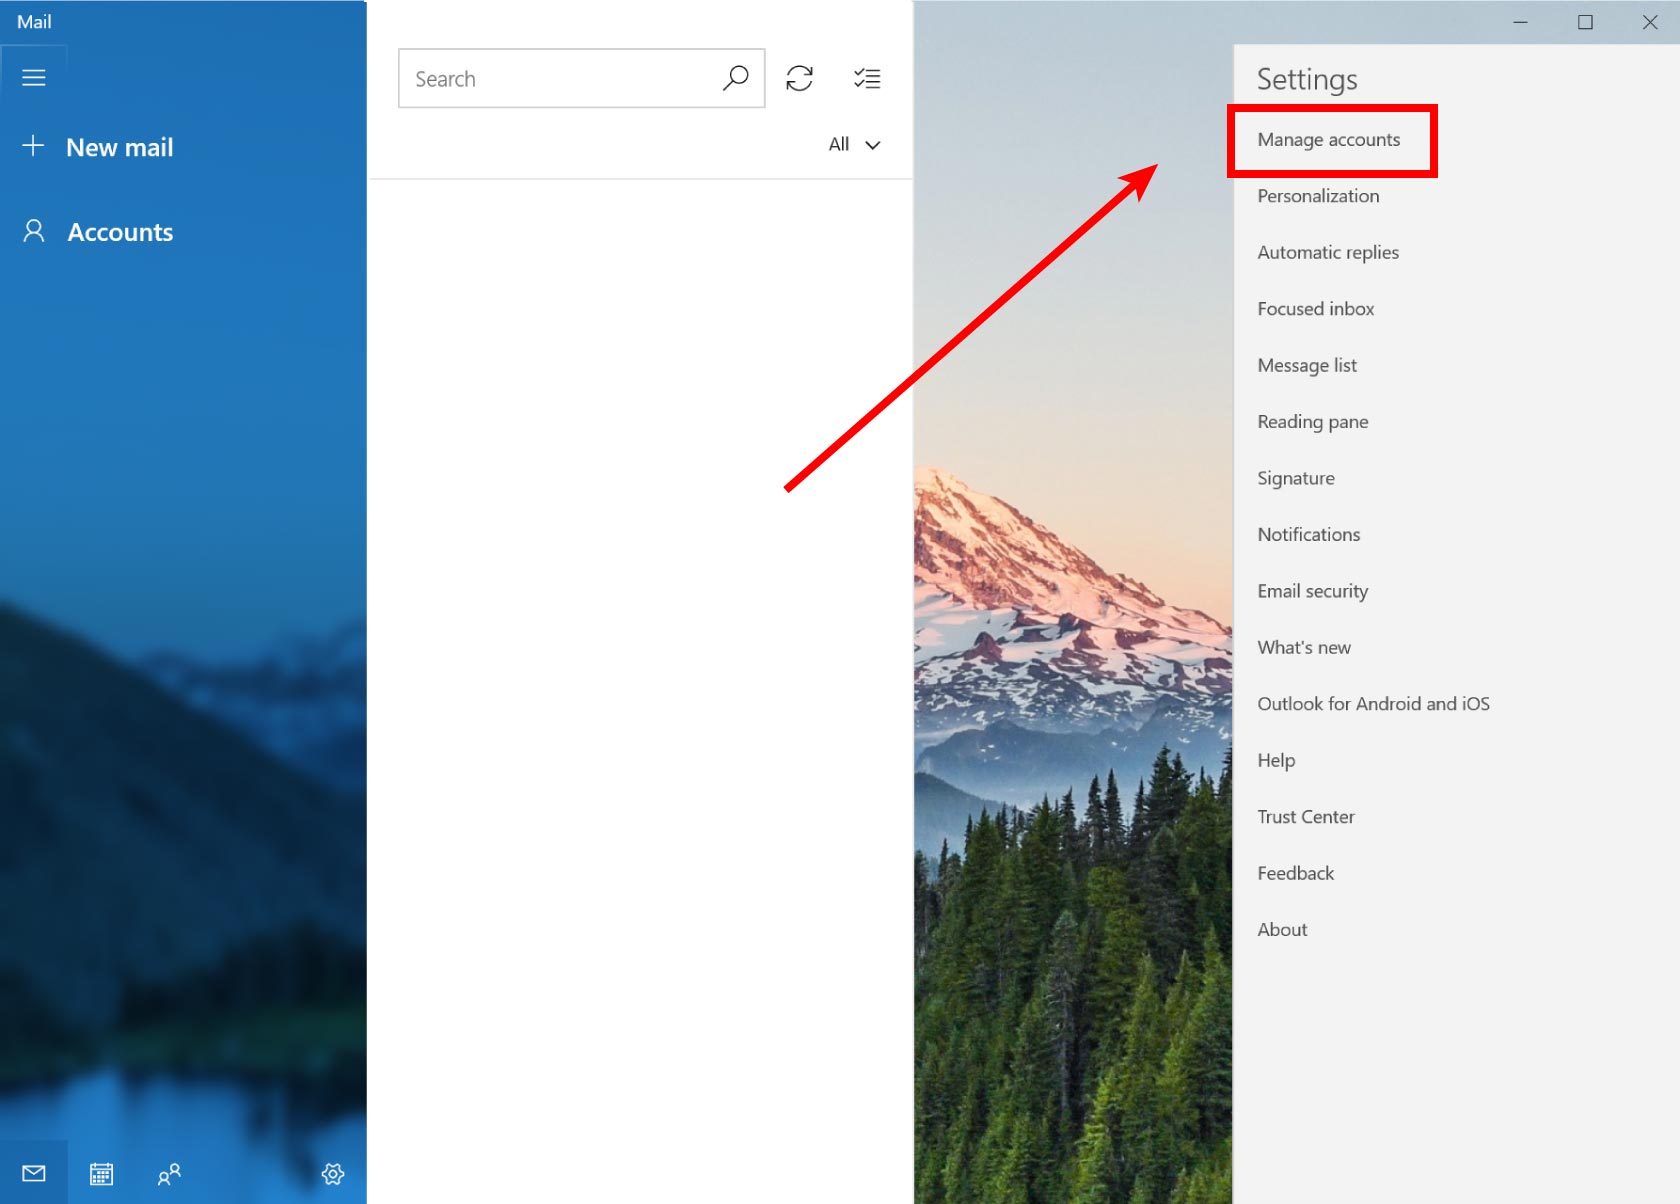
Click the Settings gear icon at the bottom of the left sidebar.
Manage accounts → Add account
In the Settings panel, click Manage Accounts, then click Add account.
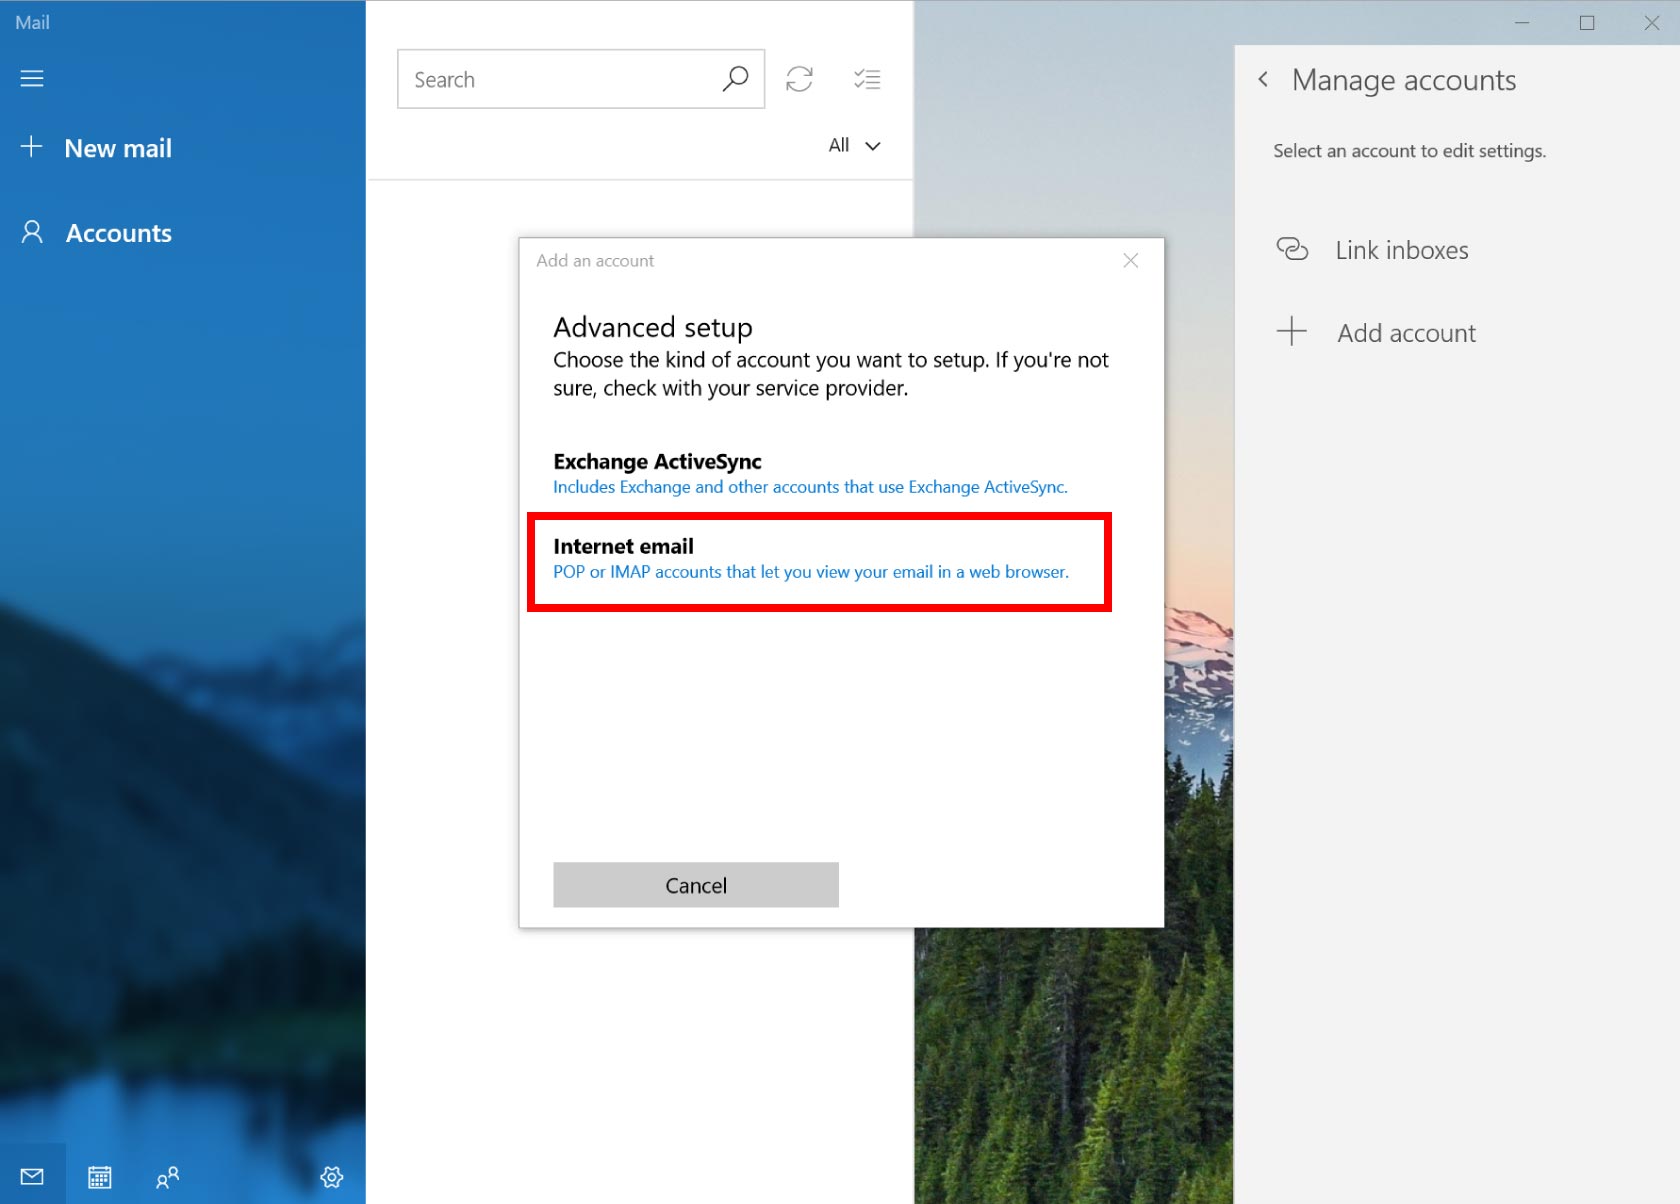
Choose Advanced setup
On the "Add an account" screen, scroll down and click Advanced setup.

Choose "Internet email"
Click Internet email.
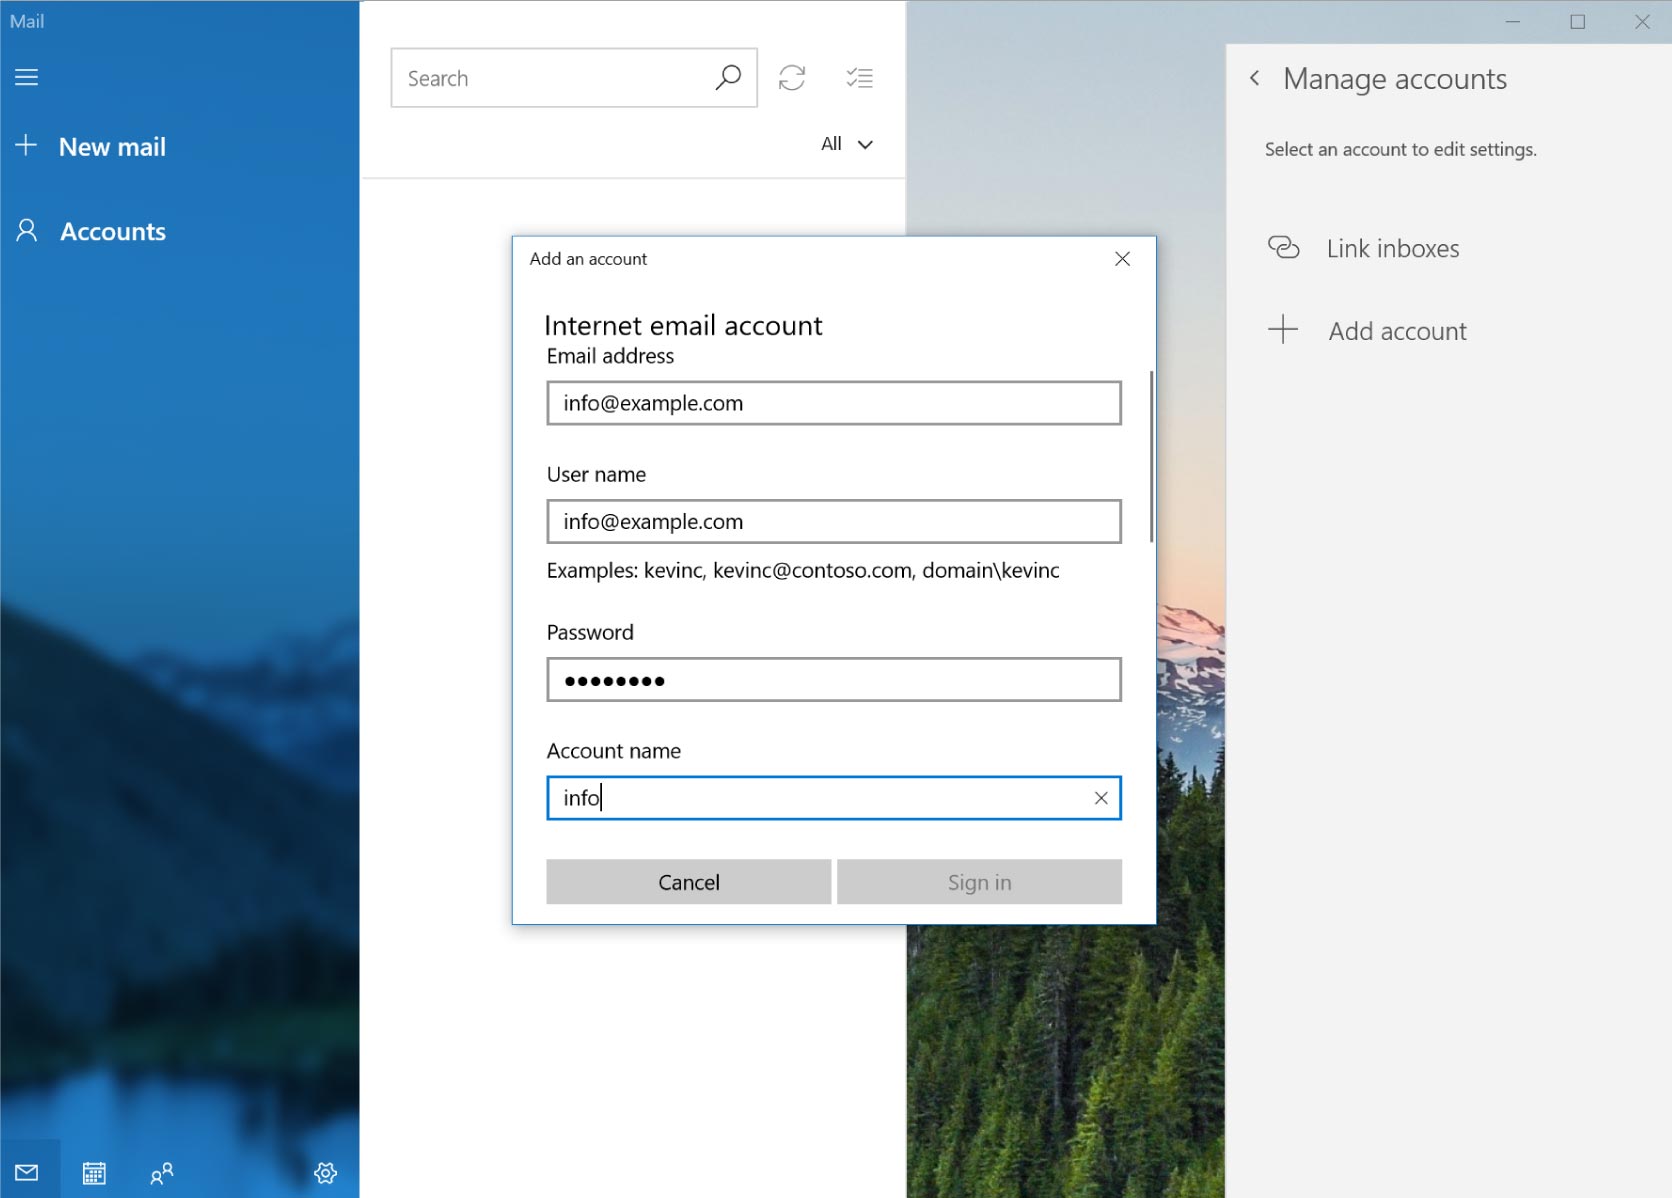
Fill in the account details
Complete all the fields on the Internet email account form:
- Email address: your full email address
- Username: your full email address
- Password: your email password
- Account name: any name you like (e.g. Topmail)
- Send messages using this name: your name
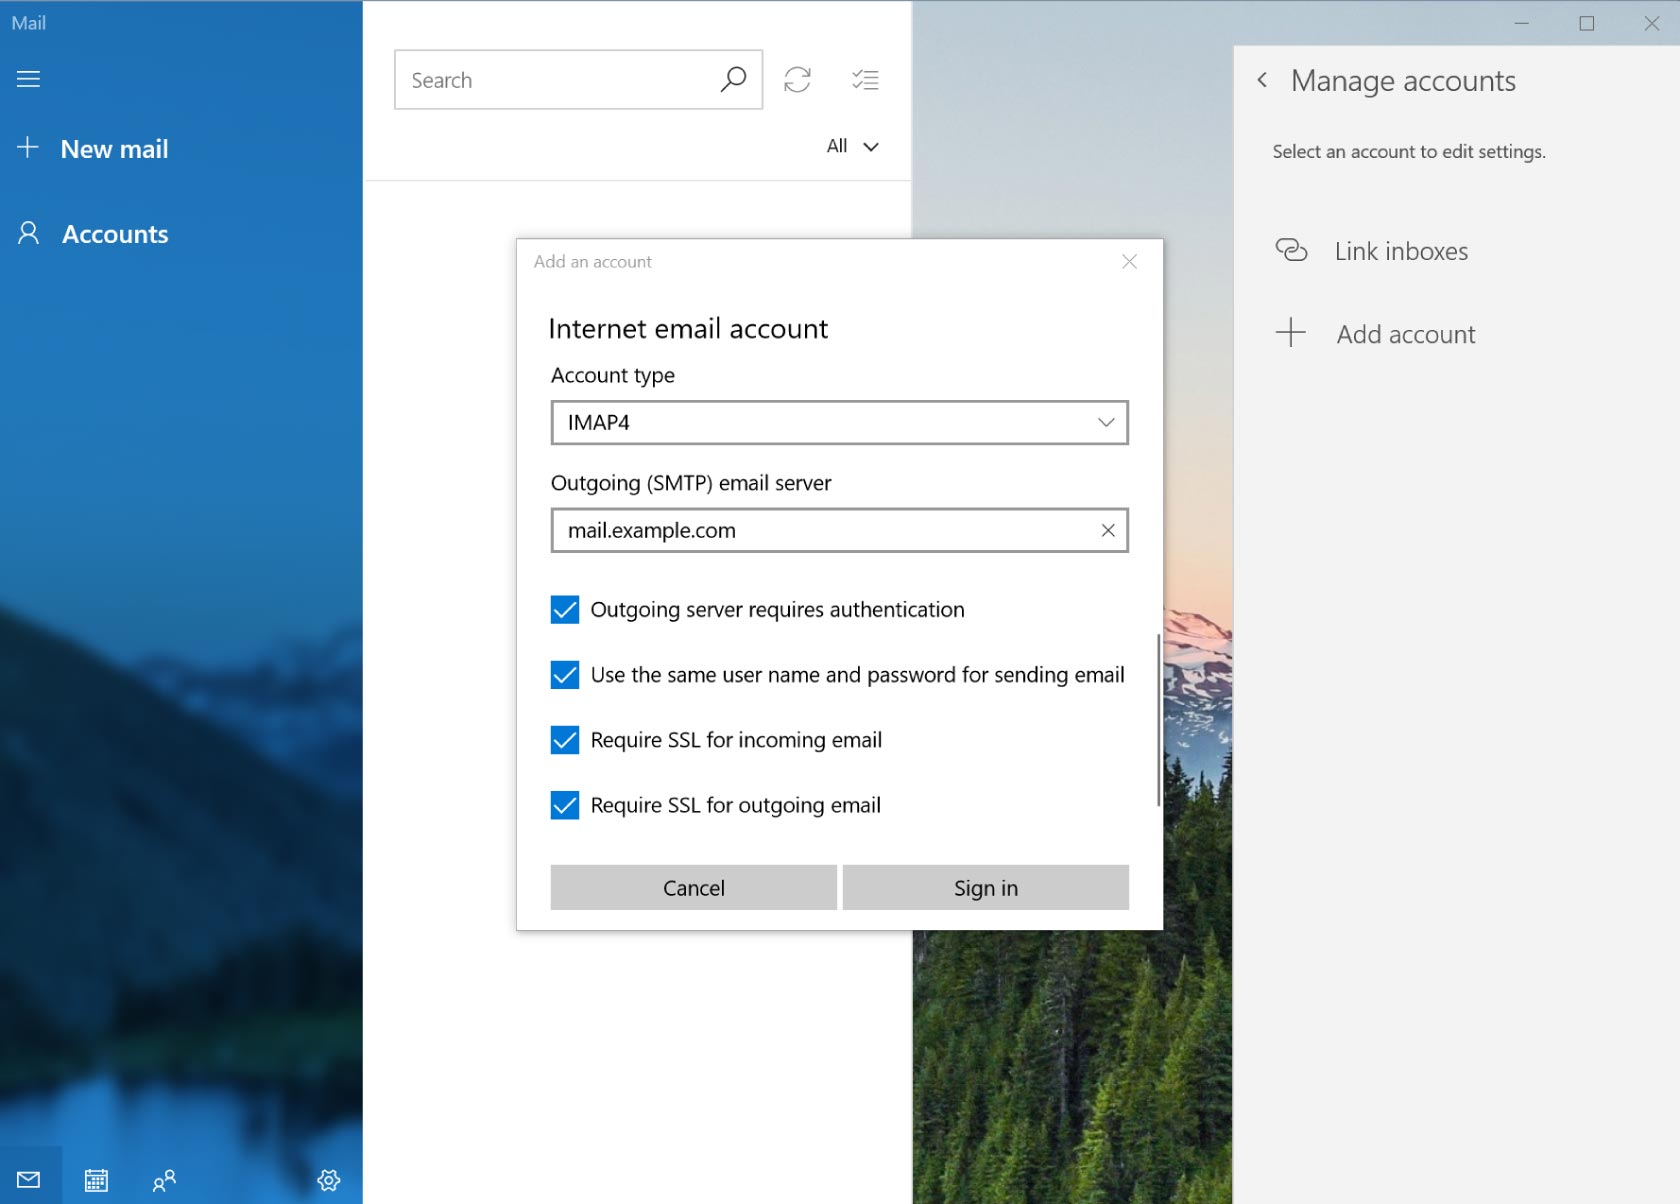
- Incoming email server:
imap.topmail.com - Account type: select IMAP4 from the dropdown
- Outgoing (SMTP) email server:
smtp.topmail.com
Enable the SSL checkboxes
Scroll down on the same form and enable all four security checkboxes:
- ✅ Outgoing server requires authentication
- ✅ Use the same username and password for sending email
- ✅ Require SSL for incoming email
- ✅ Require SSL for outgoing email
Click Sign in.
Finish setup
Click Done on the confirmation screen. Your Topmail inbox will now appear in the Mail app's left sidebar.
Troubleshooting
This is expected — the automatic setup won't find Topmail. Make sure you chose Advanced setup → Internet email and filled in all fields manually.
Double-check all fields are filled. The username must be your full email address. The incoming server must be imap.topmail.com with account type IMAP4 (not POP3).
Confirm the outgoing server is smtp.topmail.com and that both "Outgoing server requires authentication" and "Require SSL for outgoing email" are checked.